Digital accessibility law is changing. Learn more about the new Title II ADA rule, which goes into effect April 26, 2026.

Author’s Note: I am not a lawyer, and this article does not represent legal advice. It is intended to help faculty better understand upcoming changes to digital accessibility law. 

In April 2024, the U.S. Department of Justice published a final rule regarding Title II of the Americans with Disabilities Act (ADA). Title II requires that state and local government entities, including public universities, ensure equal access for people with disabilities. What this has meant for digital technology and web content has often been unclear and patchwork. The Title II rule is designed to provide clarity and consistency by establishing the technical standards necessary for digital technology and web content, specifically Web Content Accessibility Guidelines (WCAG) 2.1 Level AA. 

Here’s the upshot of all that technical language: Beginning April 26, 2026, all digital technologies used in courses must be accessible, and all course content provided through digital means (such as Canvas) must be accessible. 

Digital Accessibility: Platforms and Content 

Let’s unpack that. What does it mean for all digital technologies and all course content to be accessible? 

Digital accessibility often involves two layers: the platform and the content. Consider, for example, a Facebook post. For users with disabilities to fully engage, the Facebook platform needs to be accessible so that these users can navigate to the post and engage with the platform’s features. Additionally, the post itself must be accessible so that the users can have an equivalent experience. 

In other words, accessible platforms aren’t enough and accessible content isn’t enough: you need both for digital accessibility. 

The same principle is true of our courses: both the digital platforms (Canvas and other instructional technologies) and the digital content (learning materials, activities, assignments, exams, etc.) must be accessible. 

Of course, as a teacher you can’t be expected to assess an entire platform’s accessibility. That’s why platform accessibility is largely the responsibility of the institution adopting the technology. For example, Ball State University faculty can safely expect students to use any instructional technology that is licensed by the university, such as Canvas, Panopto, and Microsoft Office. These platforms have been vetted for accessibility, so you don’t have to worry about them. 

If you do choose to use a technology not licensed by the institution, you still have options. You can request the technology through the appropriate channels at your institution (at Ball State, this involves submitting a New Software Request, which undergoes a rigorous review process for accessibility, data privacy, and more). 

Additionally, it is often worth conducting research before requesting technology through appropriate channels. While there are no definitive signs that a platform is accessible, look for platforms that openly share a Voluntary Product Accessibility Template (VPAT) and indicate that they meet WCAG 2.1 standards. Many technologies will also provide additional accessibility documentation. For example, Canvas provides accessibility standards that detail their own testing procedures. 

You can also inquire about accessibility with a representative from the company – if they hedge or deflect, that is a red flag that the platform likely has critical accessibility issues. 

What the Title II Rule Means for Course Content 

Platform accessibility is only one half of the picture: you also need all course content to be accessible. Where platform accessibility is largely the responsibility of the institution, content accessibility is largely your responsibility as a teacher. 

Course content includes everything you share in your course with students. Accessibility concerns are particularly prominent for: 

  • PowerPoint slides (such as lecture slides) 
  • Images included in the course site, slide decks, and/or readings 
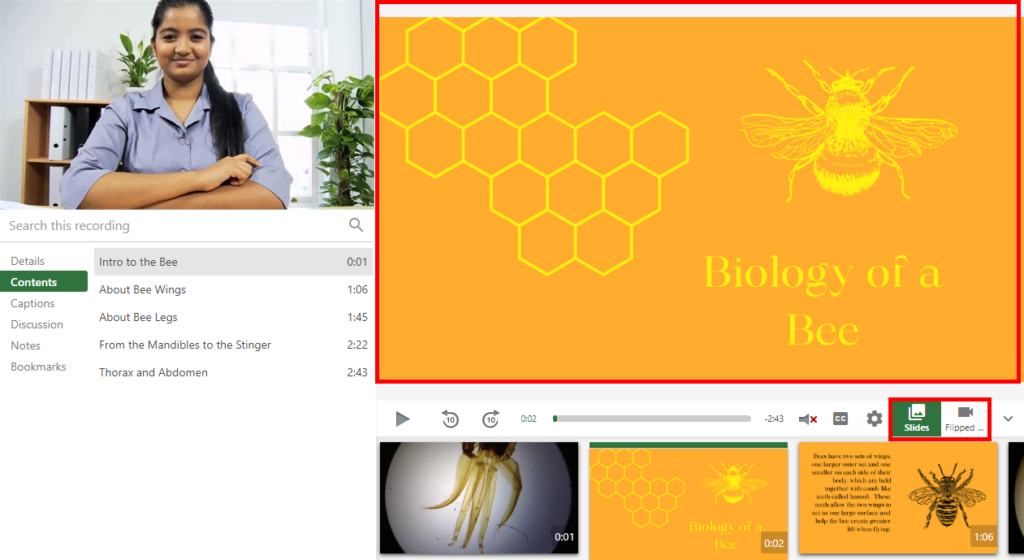
  • Video content 
  • PDF readings or handouts 
  • Course syllabus 

The Title II rule specifies that content must meet the Web Content Accessibility Guidelines (WCAG) 2.1 Level AA. 

WCAG 2.1 standards fall into four categories with the acronym POUR: 

  • Perceivable: “Information and user interface components must be presentable to users in ways they can perceive.” This includes items such as alt text for images, captions for video, transcripts for video and audio, color contrast, and more. 
  • Operable: “User interface components and navigation must be operable.” This includes items such as keyboard navigation, clear section headings, and standalone hyperlink anchor text. 
  • Understandable: “Information and the operation of the user interface must be understandable.” This includes items such as consistent navigation and readable language. 
  • Robust: “Content must be robust enough that it can be interpreted by a wide variety of user agents, including assistive technologies.” This category is largely technical and relates to the code base of technologies and content. 

These standards apply to all content provided as part of a course, including any Canvas content, syllabus and other course documents, assigned readings, quizzes, and more. 

If you’re looking for a good starting point to learn about digital accessibility, check out our self-paced course: Make Your Canvas Course Accessible. This course provides you with eight steps to address Canvas content accessibility. We will also be updating this resources in the coming months with more information about WCAG 2.1 Level AA. The advice in this course already closely aligns with these standards. 

Conclusion 

At this point, you may be wondering about your own requirements as a faculty member. While Ball State is currently working to solidify policies regarding the new Title II rule, you can expect platform accessibility to be the responsibility of the institution when the technology is licensed by the institution. Content accessibility, on the other hand, is typically the responsibility of the content creator (teacher). 

Institutions provide resources and support for content accessibility, but it also falls to the content creators to craft accessible content. As such, we recommend familiarizing yourself with digital accessibility principles by enrolling in Make Your Canvas Course Accessible. 

Accessibility is a journey, taken one step at a time – if you haven’t begun that journey yet, there is no better time than now.

Update (November 19, 2024): Canvas has changed the timeline for Discussion Checkpoints. It will now be available beginning January 18, 2025.

Learn how to use the new Discussion Checkpoints feature in Canvas to assign an initial post and required replies.

When assigning discussion boards on Canvas, it’s common for faculty to assign an initial post and one or more required replies, often with several days in between them. Previously, you had to assign and score those discussions as one item with one due date, making it harder for students to intuitively identify what they needed to do and when. 

As of January 18, 2025, faculty can now configure Discussion Checkpoints in Canvas, a feature that splits the scoring and due dates of discussions into two separate items: the initial post (called “Reply to Topic”) and required replies. 

For a quick overview, watch this explainer video from Instructure:

How to Set Up Discussion Checkpoints in Canvas 

To enable Discussion Checkpoints, first create a new discussion or edit an existing one. In the discussion settings, ensure “Graded” is checked [1], then check the “Assign graded checkpoints” box [2]. At this point, checkpoints cannot be used in ungraded discussions.

1 - Graded [checked], 2 - Assign graded checkpoints [unchecked]

This will add an area where you can assign points to the initial post (“Reply to Topic”) [1], the number of required replies (up to ten) [2], and points to the additional replies [3]. The point values for “Reply to Topic” and “Additional Replies” are automatically totaled [4].

Checkpoint Settings, Points Possible: Reply to Topic [1], Additional Replies Required [2], Points Possible: Additional Replies [3], Total Points Possible [4]

Note that you must include points in [1] and [3], even if you are using Complete/Incomplete grading. In that case, I recommend assigning 0 points to both. When you grade the discussion, it will only be considered Complete if both scores are Complete, no matter the point values you configured here. 

Finally, you can add due dates below for the initial post and required replies. The “Assign To” section works as usual, meaning you can have different due dates for different students or sections.

Assign To section shows individual dates for Reply to Topic Due Date and Required Replies Due Date
Get new posts by email

How to Grade Canvas Discussions with Checkpoints 

When you grade a discussion with checkpoints, you can enter a grade and/or status for each component: initial post and required replies.

SpeedGrader with Discussion post [1], Previous Reply and Next Reply [2], Reply to Topic Grade [3], Required Replies Grade [4], and Status dropdown [5]

The points for initial post and required replies are then totaled automatically. You still only have one comments box, and the discussion will only show as one column in the Canvas Gradebook. 

Additionally, you may choose to use a rubric on a discussion with checkpoints. If you do, you will still have to manually enter the point values for each part of the discussion, as these do not currently auto-populate from the rubric scores. 

How Students Interact with Discussion Checkpoints 

For students, discussions with checkpoints are very similar to regular discussions. On the discussion, they will see a new button labeled “View Due Dates.”

Discussion shows View Due Dates at top-left corner

When they click that button, a sidebar will open with the requirements and due dates. Once they have completed the appropriate components, this sidebar will display a “Completed” message with the date and time of their posts. 

Due Dates with both Reply to Topic and Additional Replies showing completed message

Discussions with checkpoints will display for students with two calendar events (one for initial post and one for required replies) and will display as two items on their to-do list. This provides a significant amount of clarity and helps remind students of what they need to do and when. 

Discussions with checkpoints will also show as two items in the Modules area of your course. 

Module with Discussion - Grammar Pet Peeves, Reply to Topic with due date, Required Replies (5) with due date

Conclusion  

If you require your students to reply to each other’s posts in discussions, I strongly encourage you to test out the new Discussion Checkpoints feature in Canvas. This feature helps clarify due dates and grading for students, allowing you to clearly communicate quantity and due dates of replies. 

Are you planning to test out Discussion Checkpoints? Let us know your thoughts in the comments below.

Looking to stay up-to-date on Canvas? Here are the highlights of new Canvas features introduced during Q3 2024 (July – September). For a comprehensive list of Canvas updates, see Instructure’s Canvas Releases page

  • Rich Content Editor in SpeedGrader: You can now format text in SpeedGrader, including section headings, bold/italics, hyperlinks, and lists. 
  • Assign Pages and Modules to Students and Sections: You can now assign Pages and Modules to individual students or entire sections. To learn more about using this feature for differentiated instruction, read Cheri Madewell’s blog post, “New in Canvas: Releasing Modules and Pages to Students.” 
  • Lucid in Canvas: Visual collaboration tools LucidChart and LucidSpark are now integrated with Canvas, allowing you and students to collaborate visually, brainstorm, and create visual documents such as concept maps, flowcharts, and wireframes. Learn more in Eva Grouling Snider’s blog post about the Lucid integration
  • Mobile Offline Mode (Canvas Student app): Ball State students using the Canvas Student mobile app can now download Canvas courses for offline access. Offline access only allows students to view course content. They cannot take quizzes, post to discussion boards, or submit assignments offline. The next time their device is connected to the internet, all offline courses will update with the latest content. 
  • Enhanced Rubrics: You can now enable Enhanced Rubrics in your courses for a more intuitive and user-friendly way to create, edit, and apply rubrics. Go to Settings > Feature Options > Enhanced Rubrics, then change Disabled to Enabled. 
  • Discussion Summary: Using Generative AI, Canvas can now summarize responses on a Discussion, focusing on your specific needs. To turn on Discussion Summary in your course, go to Settings > Feature Options > Discussion Summary, then change Disabled to Enabled. 

Additionally, look for the following upcoming Canvas changes: 

Look for an update about Q4 2024 changes at the end of December. We will keep you updated on all things Canvas! 

What are you excited to try out from these new features? Weigh in through the comments section below. 

Learn how to use the new Lucid integration with Canvas for visual collaboration, brainstorming, and diagramming.

LucidSpark and LucidChart are now integrated with Canvas. These tools allow you and your students to collaborate visually, brainstorm, and create visual documents such as concept maps, flowcharts, and wireframes. 

How to Use Lucid Integration with Canvas 

The new Lucid integration can be used in two primary ways: 

  • Embedded in Canvas content: Lucid documents can be embedded in Canvas content with permission settings to allow students to view, comment, or edit the documents. Lucid documents can be embedded anywhere you have access to the Rich Content Editor, such as Pages, Discussions, Quizzes, and more.
  • As an assignment for students to submit: You can create a Lucid assignment, so that students must submit a Lucid document to complete the assignment. You may require students to begin with either a template document (such as a concept map) or a blank document. 

If you are looking to coordinate collaborative activities – such as group activities or whole-class activities – we recommend embedding Lucid documents directly in your Canvas content. If you are looking to have students submit a document for feedback and grading, we recommend setting up a Lucid assignment in Canvas. 

LucidSpark or LucidChart: Which to Use? 

The Lucid Canvas integration allows you to embed or use as an assignment both LucidSpark and LucidChart documents. Both services are similar, so which should you use? 

LucidSpark is the more free-form option, serving as a collaborative virtual whiteboard. The primary tools of LucidSpark are drawing tools and sticky notes. As such, LucidSpark is best used for brainstorming and planning. 

LucidChart is more focused on building a finished product, typically a diagram, flowchart, concept map, mind map, or wireframe. LucidChart includes tools that allow for complex diagramming, such as various connectors. As such, LucidChart is best for building these specific types of documents. 

If you aren’t sure which to use, we recommend LucidChart, since its more robust features will generally allow you to do more than LucidSpark. 

How to Configure Lucid Integration with Canvas 

The first time you use Lucid in Canvas, you will need to either create a new account or connect your existing account. The following tutorial video from Lucid for Education details this process: 

Conclusion 

We encourage you to experiment with Lucid in Canvas. If you’d like a development course (an empty course without students), you can request one at bsu.edu/canvas

For more information about Lucid, we recommend browsing Lucid’s Educator Resources library. You are also welcome to reach out with questions to strategiclrn@bsu.edu, 765-285-1763. 

Learn about features of Panopto and how you can use them to create engaging instructional videos for your students.

In the coming months, Ball State will be adopting Panopto as our video platform. As we all work together to learn Panopto, I wanted to share a few highlights of Panopto features that will help you make engaging teaching videos. 

Multiple Streams 

One of the core features of Panopto that makes it stand out is the ability to record and view multiple sources (called “Streams” in Panopto). Every video has a Primary Stream (typically, the presenter’s video) and can have multiple Secondary Streams (typically, supplemental materials such as slides). For example, you could record yourself talking, a PowerPoint presentation, a website you are demonstrating, and a document camera, all at the same time. 

In the Panopto video viewer, the Primary Stream will be displayed in the upper-left corner, with the first Secondary Stream in larger view on the right. Viewers can toggle between multiple Secondary Streams and swap where the Primary and Secondary Streams appear.

Panopto video viewer. Speaker on left side, slides on right. Slide reads, Biology of a Bee.
Credit: Panopto Support

Multiple streams allow faculty creating instructional videos to enrich those videos with supplemental content that helps illustrate the concepts for learners. As we’ll see shortly, these streams also help make video editing easier and more flexible. 

Panopto Video Editor 

When creating instructional videos, I often find that about half of my time goes toward editing the videos. The Panopto video editor makes this process quick and easy. The editor is non-destructive, meaning that any changes you make can be reverted. For example, if you cut the beginning of your video, the entire video will remain in the editor and the cut can be removed at any time. 

The video editor makes it easy to cut parts of the video, including individual Streams. For example, if you want to stop sharing your slides during part of the video, you can cut only that Stream. You can add in new Streams, other Panopto videos, and YouTube videos.

Panopto video editor shows classroom capture, slides, and a timeline for editing
Credit: Panopto Support

You can also embed a webpage with the Panopto video editor. Embedding a webpage will pause your video at the location you embed it, then users can browse the webpage before returning to the video. This can be helpful if you want your students to interact with web content as part of your video. 

Finally, you can add a quiz to your video, then pass the results of that quiz to a Canvas assignment. Available quiz question types include True/False, Multiple Choice, Multiple Select, and Fill in the Blank. 

Get new posts by email

Setting a Panopto Video as a Canvas Assignment 

You can put hours of energy into creating engaging instructional videos, but those videos will only be impactful if your students actually watch them. 

One exciting feature of Panopto is the ability to set watching a Panopto video as its own Canvas assignment, letting you automatically assign points to students based on how much of a given video they watched. 

How would you like to grade this assignment? Grade on % viewed (selected), Grade on quiz results, Continue (selected)
Credit: Panopto Support

This feature only recognizes the time played on the video, so students cannot just scrub to the end of the video. Add a quiz question partway through the video, which will pause the video for the student to answer, and you can work to ensure your students are watching your videos and getting credit for watching them.  

Creating a Video Assignments in Canvas 

In addition to assigning students to watch a video and get points, you can assign students to create their own Panopto videos as the assignment submission

After a student records and submits the video, it will no longer be editable, so you don’t need to worry about students changing the video later. You can learn more about how this process works for students

Discussions, Notes, and Bookmarks 

You can use Panopto to encourage rich student engagement with your videos through three features: 

  • Discussions: With Discussions, your students can ask clarifying questions attached to a specific timestamp in the video.
  • Notes: With Notes, your students can take notes about your video and review those notes alongside specific parts of the video.
  • Bookmarks:  With Bookmarks, your students can identify parts of the video to return to later and rewatch. 

Conclusion 

Panopto is currently available for use in Ball State’s Canvas, and it will become the only available video platform for Ball State beginning in Spring 2025. Stay tuned for more Teaching Innovation Blog posts about Panopto, including the much-requested quiz feature. 

As you create and share videos with Panopto, I would love to hear about your experiences and how you are finding pedagogical applications for the tool. Please feel free to share your thoughts in the comments below.

For more information on Panopto, visit the Panopto FAQ page.

Update (May 13, 2024): The authors of this post presented a virtual workshop entitled Introducing the Canvas Discussions Redesign. You can watch a recording of that workshop here.

Learn about the Canvas Discussions Redesign, which brings a new look and new features to Canvas Discussions and Announcements, beginning July 20, 2024.

Canvas Discussions and Announcements will soon have a new look and new features. What do you need to know about these updates, and how can you put them to use to improve Discussions in your course?

How to Enable Canvas Discussions Redesign 

The Canvas Discussions Redesign will automatically be enabled in all your Canvas courses beginning on July 20, 2024. Prior to July 20, you can manually enable it in each course. Open the course you want to enable the redesign on, go to Settings > Feature Options, and change Discussions/Announcements Redesign from Disabled to Enabled. 

Discussions/Announcements Redesign - Feature Preview. Enabled / Disabled, with enabled selected

Changes to Know About in Canvas Discussions Redesign 

The Canvas Discussions Redesign is intended to better facilitate communication through Canvas Discussions. Below, we highlight a variety of new features and changes, including @mentions, quoted replies, anonymous discussions, and interface changes. 

@mentions 

Users can now tag other users in Discussion posts and replies. To tag a user, type @, which will open a pop-up box where you can select the user you would like to mention.

Mention window shows multiple student names, with one student name selected

By default, users will receive immediate notifications via email and push notification of any @mentions. These notifications can be customized at Account > Notifications > Discussions > New Mention. 

Discussions notifications, New Mention is set to notify immediately

Consider encouraging your students to use @mentions when replying to each other. @mentions may also open new possibilities for Discussions. For example, in one writing course I (Eva) teach, I assigned a Discussion where students working on a collaborative project read each other’s past Discussion posts and identify 2-3 strengths in each other group member’s writing. I required students to @mention each other so they could quickly and easily identify what their peers said about their strengths as writers. 

Quoted Replies 

Users can now quote replies in their own replies. To quote a reply, click the three dots and select “Quote Reply.”

Discussion post menu with Quote Reply selected

The quoted reply will display above your own reply, with a toggle to turn on or off the quoting. Unfortunately, you cannot currently quote part of a reply, only the entire reply. 

Consider encouraging students to use this when you have large or complex discussion threads. These threads can be difficult to navigate and fully understand what someone is replying to, and quoting a reply can help bring clarity to complex threads. 

Anonymous Discussions 

Teachers can now configure a new Discussion with three different levels of anonymity: 

Off: student names and profile pictures will be visible to other members of this course, Partial: students can choose to reveal their name and profile picture, Full: student names and profile pictures will be hidden

Some features are not supported in Anonymous Discussions, including Grading and Groups. 

Consider using Anonymous Discussions for situations where you want students to reply honestly without concern for their academic performance. For example, you could use Full anonymity on a Q&A Discussion, where your students can ask questions about the course without concern that you will judge them for their questions. 

You can also read about more possible uses of Anonymous Discussions in Shane Lanning’s post, “How to Create Anonymous Discussion Boards with New Canvas Redesign and Why You Might Want To.”

Edit History 

Teachers can now view the edit history on posts that have been edited by a student. On any post that a student has edited, a button at the top of the post will appear labeled “View History.” Clicking this link will open a pop-up window to view all past versions of the post. 

Edit History window shows multiple versions of the post, with the original text of each post

Reporting Replies 

Users can now report any Discussion reply by clicking the three dots next to the reply and selecting “Report.” This will open a pop-up window where they can select one of three reasons: Inappropriate, Offensive / abusive, or Other. Reported replies will remain visible unless they are deleted by the Teacher. 

Reported replies will be sent to you to review. You can edit your notification settings for reported replies by opening your course and clicking the “View Course Notifications” button in the right sidebar. Scroll down to the Discussions area and make any desired adjustments to the Reported Reply row.

Sidebar menu includes Import Existing Content, Import from Commons, Choose Home Page, View Course Stream, New Announcement, New Analytics, and View Course Notifications (selected)

By default, the ability to report replies will be toggled on. You can turn this off on a course-by-course basis by visiting Discussions in your course navigation and clicking the gear icon in the top-right corner to open your course’s Discussion settings. Uncheck the box labeled “Report replies” to toggle this feature off.

Discussion Settings window includes checkbox: Report replies (checked)

Checkpoints (Multiple Due Dates) 

The much-requested feature of Checkpoints will allow Teachers to add multiple due dates to a Discussion, such as an initial post date and a follow-up reply date. This feature is coming prior to the official launch of Discussions Redesign – Canvas has currently identified June 30, 2024 as the rollout date for Checkpoints. 

We will update this blog post with more details about Checkpoints when they are available for you to use. 

Interface Updates in Canvas Discussions Redesign 

The Canvas Discussions Redesign also includes a new top bar for searching posts and changing the display of posts. New options in this top bar include: 

  • Threads can be viewed in a sidebar window by toggling “View Split Screen”
  • Posts default to oldest first but can be changed to newest first by toggling “Sort”
  • Threads default to collapsed but can be expanded by toggling “Expand Threads”
  • Group Discussions now include a button in the top-left corner for viewing individual discussion boards for each group
    Groups window displays multiple group names - Usability Testing Report Group 1, 2, 3, and 4

In addition to the new top bar, all posts to a Discussion by a Teacher will include a role tag that quickly identifies you as the Teacher. 

Eva Snider - Teacher

A Quick Note About Canvas Announcements 

The changes from the Canvas Discussions Redesign detailed above will also apply to Canvas Announcements. If you want students to be able to reply to an Announcement, you will need to enable this feature by visiting Settings in your course navigation, scrolling down, selecting More options, unchecking the box “Disable comments on announcements,” and selecting Update Course Details. 

Recommendations for the Canvas Discussions Redesign 

While the Canvas Discussions Redesign includes many new features, it’s likely only a few of these will be useful for your courses. We recommend choosing one or two new features, such as @mentions or anonymous discussions, and exploring how you can use those features to facilitate new kinds of communication in your course. 

Ball State faculty can also find a new featured resource in Canvas Commons (open Canvas and click “Commons” in the far-left global navigation). Entitled, “How to Get the Most Out of Canvas Discussions,” this page can be added to any of your courses. It is designed to help students learn about the features of Canvas Discussions, including how they can use them to better communicate with their peers. We recommend adding this page to any course where you use Discussions regularly. 

How to Get the Most Out of Canvas Discussions

What are you excited to explore with the new Canvas Discussions Redesign? Share your thoughts in the comments below.

Students are exhausted, but just how exhausted are they and why? Discover data from the Student Satisfaction Survey about student exhaustion and fatigue.

If you ask your students how they’re feeling, it’s likely you’ll hear a chorus of “tired,” “exhausted,” or “low energy.” In this special two-part post, we’re going to explore the effects of exhaustion on students and how you can help exhausted students (without exhausting yourself). 

Like our two-part series on flexibility (Helping Students Fit Education Into Their Lives, Part 1 | Part 2), we’ll begin by examining data related to exhaustion, including what Ball State students have shared through the Student Satisfaction Survey. In the second part, we’ll suggest teaching strategies to help students dealing with exhaustion. 

How Many Students Are Exhausted 

Every semester, Ball State students share their experiences with their education through a Student Satisfaction Survey. Included in those experiences are the challenges students face – we have discussed those challenges in more depth in an earlier blog post

The Fall 2023 survey included 2,514 student responses. Three new challenges were added to the list of possible challenges: “exhaustion or fatigue,” “loneliness or isolation,” and “physical health and wellness.” 

Exhaustion or fatigue was the most common challenge at 76% of Ball State students, with 29% of students experiencing moderate exhaustion and 16% facing serious exhaustion. Exhaustion was the most common challenge for a wide range of students, including online (70%), on-campus (79%), undergraduate (78%), and graduate students (74%). For undergraduates, first-year students were the least likely to be facing exhaustion (74%) and sophomores and seniors were the most likely (85%). 

Students facing moderate or serious exhaustion are also more likely to be facing other challenges. In particular, mental health challenges (94%) and motivation to complete schoolwork (88%) are significantly more common among exhausted students. 

Exhausted students are less likely to agree that the amount of coursework is appropriate (68% online courses, 63% on-campus courses compared to 73% and 70% respectively). Exhausted students are also less likely to respond positively in areas related to course satisfaction, including the relevance of courses and course materials, opportunities to engage with instructors and peers, and flexibility with deadlines. 

What Students Say About Exhaustion

Comments from students about exhaustion help illuminate what exhaustion means for them and what may be behind their exhaustion. 

While students identify a number of reasons for exhaustion, many simply point to the wide variety of responsibilities they have to balance. For example, one student shared, “As a college student working two jobs, trying to balance work, friendships, family, and schoolwork is exhausting.” Another student shared, “I feel like I haven’t had a moment to breathe this entire semester. Every time I finish one project I already feel behind on the next one.” 

Some students point to specific responsibilities leading to their exhaustion, such as work, family, or being a student athlete. Overall, though, it’s clear that students’ busy schedules are leaving them with little time. As one student shared, “I literally could spend every waking hour doing work and still not get all the extras done.” 

One consistent theme that emerges is that students are lacking time for themselves: time to rest, develop or practice hobbies, see friends, etc. One student shared, “On days off, I just want to exist rather than do assignments to remind myself I’m a person.” Another student shared, “I don’t have time for personal health, I barely get sleep, I haven’t been to the gym in 2-3 months simply because I legit don’t have time.” It’s clear that exhaustion from a busy schedule is at least in part due to what one student called “losing valuable resting time.” 

Other, less prevalent issues that lead to exhaustion for students include dealing with illness, sleep issues (such as loud roommates or uncomfortable dorm accommodations), sick family members, etc. 

Are Students Burning Out? 

Exhaustion and fatigue are complex issues that can cover emotional, cognitive, and physical exhaustion. One way to consider this data is in the context of burnout, specifically the Job Demands-Resource (JD-R) model of burnout. 

The JD-R model of burnout, first proposed by Demerouti et al. (2001), suggests that people tend to burn out and disengage primarily because of high demands (such as working overtime or taking on emotionally draining work) and low resources to deal with those demands (such as receiving minimal feedback or not having autonomy). 

In the JD-R model, exhaustion is most closely associated with high demands, while disengagement is most closely associated with low resources. 

This model can be helpful for considering student burnout (and has been applied to student burnout). While faculty may have little effect on the high demands placed on students, we are one of the key contributors to the availability of resources for students. We can work to help students deal with the high demands placed on them through a variety of teaching strategies that help exhausted students. 

We’ll be taking this topic up in the next part of this two-part post, so stay tuned! 

What are your experiences with exhausted students? Share your thoughts in the comments below.  

References

Demerouti, E., Bakker, A. B., Nachreiner, F., & Schaufeli, W. B. (2001). “The Job Demands-Resources Model of Burnout.” Journal of Applied Psychology 86, no. 3 (2001): 499–512. https://doi.org/10.1037/0021-9010.86.3.499.

Jagodics, Balázs, and Éva Szabó. “Student Burnout in Higher Education: A Demand-Resource Model Approach.” Trends in Psychology 31, no. 4 (2022): 757–76. https://doi.org/10.1007/s43076-021-00137-4..

Configuring late passes in Canvas can offer students structured flexibility to support them in successfully completing your course.

In a recent post, “Lessons Learned from the COVID-19 Crisis: Why Balancing Flexibility and Structure in Course Policies Is Important,” Ellen Whitehead and Mellisa Holtzman shared their research about teaching practices adopted by faculty during the pandemic. Their interviews of 43 faculty highlighted the need to balance leniency and stringency, providing “structured flexibility” to help students succeed. 

One way to accomplish this structured flexibility is late passes, a system in which students can submit late work by using or redeeming a late pass. Late passes are a form of proactive extensions: students know in advance that they can receive an extension if they have a pass available. 

In this post, I will share my method of structuring late passes and coordinating them via Canvas. I use some variation of this method when teaching online courses, although my in-person setup is not dramatically different. I understand that my setup is idiosyncratic. My hope is that making late passes more concrete here can help you think about how you might work them into your own courses and teaching practices. 

My Late Pass Policy

In my online courses, most work is due on Sundays at 11:59 P.M. for consistency and stability. I offer a 24-hour grace period beyond that where work is not considered “late,” and 25-50% of students take advantage of that grace period. 

If a student wants to turn something in late after that grace period, they must use one of a limited quantity of late passes. For simplicity of tracking, I do not distinguish between different late passes for different types of assignments. Students begin the semester with 7 late passes, each of which is good for a one-week extension, and they may stack them on the same assignment if they wish. 

I designed my late pass system to encourage students to use them, rather than hoard them. I provide 7 to ensure that taking one doesn’t harm the student’s future flexibility, and I regularly provide reminders to students that they can use a late pass. These reminders are particularly effective when the due date for an assignment is fast approaching, as it helps give students the breathing room to effectively complete the assignment without cramming or rushing. 

Setting Up Late Passes in Canvas

The technical configuration of my late pass system has two parts: 

  1. A Google Form for students to “use” (or redeem) a late pass 
  1. A Canvas gradebook column for tracking the student’s current quantity of late passes 

The form for using a late pass is simple, asking for: name, assignment, if the late pass is being used for an initial submission or revision, how many late passes (each pass = a week), and open comments. I emphasize that the comments do not need to be completed, as late passes are “no questions asked” extensions. I configure this form to notify me via email of new responses

The Canvas gradebook column is also simple: it is configured as a 7-point “No submission” column that does not count toward the final grade. I use the “Set Default Grade” option in the column menu to assign a 7 to all students at the beginning of the semester. 

Canvas settings, including - Points: 7, Assignment Group: Late Passes, Display Grade As: Points, Do not count this assignment towards the final grade, Submission Type: No Submission
Screenshot: Canvas configuration.

Whenever I receive a notification of a new late pass from the Google Form, I do the following: 

  • In the Canvas gradebook, reduce the Late Passes score for that student 
  • Add a comment to the Late Passes assignment for that student with the name of the assignment the late pass is being used on (this helps provide a semester-long record of all late passes) 
  • Add a comment on the appropriate assignment indicating that the student has used a late pass (this helps prevent me from accidentally assigning them the wrong grade because I did not realize they used a late pass) 

The final component of this late pass system is putting it front and center in my Canvas course. I include information about late passes on my syllabus and in my Canvas course site. I also include a box on my homepage that links to both the Google Form and the information about late passes, so students have quick and easy access. 

Canvas content including - Heading: Use a Late Pass. Button: Use a Late Pass (Complete the Form). Button: Review the Late Work Policy
Screenshot: Late Pass request.

Benefits and Limitations of Late Passes in Canvas

The primary benefit of configuring late passes in Canvas is clarity: students can easily identify how many late passes they have left and which assignments they have used them on so far. A secondary benefit is visibility: using Canvas to track late passes gives them legitimacy and makes them an “official” part of the course, thus encouraging students to use them when needed. 

This system is not without its flaws, most notably the need for manually updating Canvas in multiple places. Additionally, I have concerns that a Canvas gradebook column could make students think that late passes are a traditional “grade,” leading to them not using them to retain the “higher” grade. I actively encourage use of late passes and emphasize in my policy that unused late passes do not count as any kind of credit at the end of the semester. 

Ultimately, I use late passes because I want to offer students the same flexibility I have as an instructor. While I aim to give feedback on assignments within 3-4 days, sometimes I take a week or more. Life happens, and work that can bend without breaking is often much better to fit into our lives. 

What do you do to offer students structured flexibility? Share your thoughts in the comments below. 

References

Holtzman, Mellisa, Ellen Whitehead, and Ayrlia Welch. 2023. “Adjusting Class Policies Amid a Pandemic: How Lessons Learned During COVID-19 Can Help Faculty Prepare for Other Institution-Wide Crises”. Teaching and Learning Inquiry 11 (February). https://doi.org/10.20343/teachlearninqu.11.7.

Read a breakdown of one AI syllabus policy to help you consider how to craft your own AI policy.

If you have (or are considering adding) an AI policy on your syllabus, this post is for you. 

I’m going to share my AI syllabus policy and break down how I wrote that policy. I am not advocating for my policy, as these decisions are strongly dependent on your discipline, your students, and your teaching philosophy. Rather, I want to provide a window into the thinking behind my AI syllabus policy in the hopes it can encourage you to thoughtfully explore your own.

If you are looking for a comprehensive list of AI syllabus policies, Lance Eaton curates a list across institutions. If you are wondering whether you should even include an AI policy, read Kevin Gannon’s article in the Chronicle of Higher Education about that topic (Ball State readers can access the Chronicle through University Libraries). 

My AI Policy

For reference, here is my AI policy, which will ground the discussion in the following sections: 

You are welcome to use generative artificial intelligence (GAI) tools such as ChatGPT for any work in this course. Any use, even for the purposes of planning, must be appropriately acknowledged and cited. Make sure to review information about how to cite ChatGPT in MLA style, APA style, or the citation style most commonly used in your field. Any uncited use of GAI tools will be considered plagiarism and is subject to the university’s Student Academic Ethics Policy

If you would like help navigating the use of GAI tools, please contact me or schedule an appointment to talk. These tools are powerful, and with careful and thoughtful use, they can help save you time and produce better writing. 

Be aware that GAI tools currently have significant limitations. They are prone to making up facts, making assumptions about the rhetorical situation, and much more. Never uncritically accept the written results of ChatGPT without verification and revision. 

Step 1: What Do I Want to Allow?

Before I wrote my policy, I had to identify the boundaries I wanted to set regarding generative AI tools. 

Broadly, AI syllabus policies can: 

  • Prohibit all uses of generative AI 
  • Prohibit select uses – for example, allowing students to generate outlines but not allowing them to lift text directly from a chatbot 
  • Prohibit use unless permission is given in advance by the instructor 
  • Allow with acknowledgement or citation 
  • Allow without acknowledgement or citation 

Which of these you choose depends on several factors, chief among them the goals of your course. The AI syllabus policy I shared above is for a course that is designed to help students develop as professional writers. I decided that not using AI would shut off avenues of writing that would be relevant now and in the future for professional writers. I use generative AI in my job, and it is already a part of the professional writing landscape. However, professional writers are working to critically and ethically use AI, and acknowledgement and citation are part of that process. Allowing use without acknowledgement or citation would not help my students explore how AI can fit into their writing processes. 

Step 2: What Supports Do I Want to Provide?

For all except the most prohibitive AI policies, support can help students navigate the policy and their use of AI. This support can take the form of resources and information, offers of help, examples to make the policy more concrete, and more. 

In my case, since I chose to allow AI use with citation, I needed to provide information about citing AI. My course does not use a single specific citation manual, so I linked students to information for MLA and APA styles. AI citation is likely to continue to change, so linking helps me keep this information up-to-date with the guidance from style guides. 

I also extended an offer to my students to discuss their use of AI in the course. I did this to help them think critically about incorporating AI into their work. 

Step 3: What Advice Do I Want to Provide?

The first two paragraphs of my policy cover the rules for AI use and the supports available. However, as I stated in Step 1, my goal behind this policy was to help students navigate what will likely be an important technological tool in their future careers. 

The benefits of AI are likely already obvious to students: time savings, quick idea generation, etc. Additionally, I include course materials on navigating AI as professional writers. I decided, then, that the advice I wanted to provide students was predominantly a warning: generative AI cannot be safely used without human intervention. 

For example, this course is about writing to address specific rhetorical situations, considering concepts such as users, genre, accessibility, and usability. Generative AI like ChatGPT prioritizes giving you an answer to your inquiry, no matter how little or how much information and context you provide. GAI, then, are prone to making massive assumptions about the rhetorical situation, significantly missing the mark. 

These issues with GAI can be easy to overlook for students who are learning these concepts themselves. A warning like the one I added in my final paragraph, then, can help students understand that this tool will need to be wielded with thought and consideration. 

Conclusion

I want to reiterate that I encourage you to go your own direction with an AI syllabus policy. There is no “right answer” to whether to include an AI policy, where to include it, or what to say. 

However, the need for AI syllabus policies illuminates the fact that we are all grappling with the implications of these new tools. By thoughtfully considering not just what you want to allow (or prohibit) but how you want to support and guide students, you can create an AI syllabus policy that helps students effectively navigate AI in their education. 

References

Eaton, Lance. “Syllabi Policies for AI Generative Tools.” Google Docs, January 16, 2023. https://docs.google.com/document/d/1RMVwzjc1o0Mi8Blw_-JUTcXv02b2WRH86vw7mi16W3U/mobilebasic.

Gannon, Kevin. “Should You Add an AI Policy to Your Syllabus?” The Chronicle of Higher Education, July 31, 2023. https://www.chronicle.com/article/should-you-add-an-ai-policy-to-your-syllabus.

Supplement your office hours with in-person or virtual appointments that students can book straight through Canvas using Appointment Groups.

Have you ever bemoaned the fact that students don’t come to your office hours? In this post, you’ll learn about a Canvas feature that can help you increase the amount of one-on-one time you get with your students. 

There are many reasons that students don’t attend office hours, such as not knowing what they are, not knowing how to make effective use of them, or being afraid of judgment or reprisal. One of the easiest to fix, though, is not knowing what will happen. 

For students, office hours can be a bit like going to the doctor without having an appointment. Maybe the doctor can see you, but maybe they’ll be with other patients or busy with other tasks. Students may wonder: Will the teacher be available? Will there be other students present? Will they be headed to the bathroom or down the hall chatting with a colleague? Will they be surprised by my presence? Will I need to knock on their door, or will they have it open? 

These may sound like minor concerns, but minor concerns are often critical to decision-making. For students with anxiety, these unknowns are stressful and can be enough to push them to not attend office hours. For first-generation students, international students, and non-traditional students who have less experience with office hours, these unknowns just serve to make the entire experience more baffling. 

Further, help-seeking is often stigmatized and can be associated with feelings of shame or inadequacy. Anything you can do to encourage help-seeking is likely to lead to more of those desired behaviors.

A Solution: Booking an Appointment with You 

As the doctor’s office example above illustrates, a lot of the reservations students have about office hours can be solved with the clarity of appointments (in-person or virtual). Appointments are a known quantity: you know when to show up, where to show up, and that you will get what you need during the appointment. 

While there are many third-party tools to help facilitate appointment booking, you can keep students in your Canvas course ecosystem by using Appointment Groups in the Calendar feature. 

Appointment Groups are blocks of available appointments that students can book. To schedule one or more Appointment Group, do the following: 

  • Open Calendar from the Canvas global navigation 
  • Click the + button in the top-right to create a new event 
  • In the box that pops up, select the Appointment Group tab 
Edit Event - Appointment Group. Includes fields for Name, Location, Claendar, Date, Time Range, Options, and Details

Give your Appointment Group a name and location. For Zoom appointments, I recommend providing the Zoom link both in the Location box and in the Details box at the bottom. Select your course from the Calendar area. If you wish, you can check the box to have students sign up in groups. 

On the right side, you will configure the available appointments, including dates and times. The “Divide into equal slots” area allows you to input time blocks, then click “Go” to automatically divide those blocks into actual appointment slots. 

The “Options” area lets you adjust availability of appointments. Personally, I prefer to limit each time slot to 1 student and leave the “Limit participants to attend” box unchecked. I do this with 15-minute appointments so that if a student feels they could use 30 or 45 minutes, they can book back-to-back slots. 

You are welcome to set up Appointment Groups across multiple days – I do this at the beginning of the semester to populate the entire semester. Once you have configured your Appointment Group, click Publish. It will show on your Calendar as gray blocks. If you don’t see these slots, make sure you have the right calendar selected from the right side. 

Calendar with time blocks for Student Appointments every 15 minutes

For students, booking an appointment is easy. You can direct them to Canvas guide, “How do I sign up for a Scheduler appointment in the Calendar?” They simply open the Calendar, click “Find Appointment,” select the course, click a desired time slot, and click “Reserve.”

Calendar with date picker, Find Appointment button
Student Appointment - Calendar name, Location, Details, Slots available, Comments, Reserve button

If you use this feature, make sure you encourage students to adjust their Canvas notification settings. Setting all “Scheduling” notifications to “Notify immediately” will ensure that you and your students don’t miss any important messages about an upcoming appointment. 

Scheduling - Student Appointment Signups, Appointment Signups, Appointment Cancellations, Appointment Availability, Calendar

Conclusion 

The Appointment Groups feature in the Canvas Calendar can help you supplement your office hours and get more one-on-one time with your students. Configure Appointment Groups at the beginning of the semester, tell your students about them, and be on the lookout for notifications. 

If you decide to try this feature out, let us know how it goes! 

How do you encourage students to attend office hours or book appointments? Share your thoughts in the comments below.