
Have you ever taken a photo that didn’t quit turn out the way you wanted to? Don’t worry, with these tips you can easily make your photo a little bit better than it was. However, please note these tips are basic composition and exposure techniques that will not change the overall context of the photo. Other edits to lighting/color of photos would be considered photo illustrations. You cannot add or takeaway anything from a photo because that breaks photo ethics.
*Note: All tips in this post are based on editing techniques that can be done in Adobe Photoshop. Other programs might have similar functions under different function names.*
Where are the tools I need located?

What can I do with these tools?
Lasso: This tool is used to make selections, along with the Rectangle Marquee Tool. The difference between these is the lasso tool is free-form.
Crop: This tool allows you to select the part of the image you want to keep just by dragging your cursor to make a rectangle.
Path Selection: You can select different elements of the document with this tool.
Hand Tool: This allows you to click and drag around the document.
Foreground Color and Background Color: This is less for photo editing, and more for design but you change colors with these boxes.
History Panel: Allows you to go back in time to easily undo a task.
Adjustment Panel: This is where you find tools to make adjustments, such as brightness/contrast, and levels.
Brightness/Contrast and Levels: Used to make small corrections to return a photo to how your eyes saw it.
What is a good crop?
First of all, when you’re looking to crop you should follow rule-of-thirds. This is when you have a grid split into nine boxes, just like the photo below.
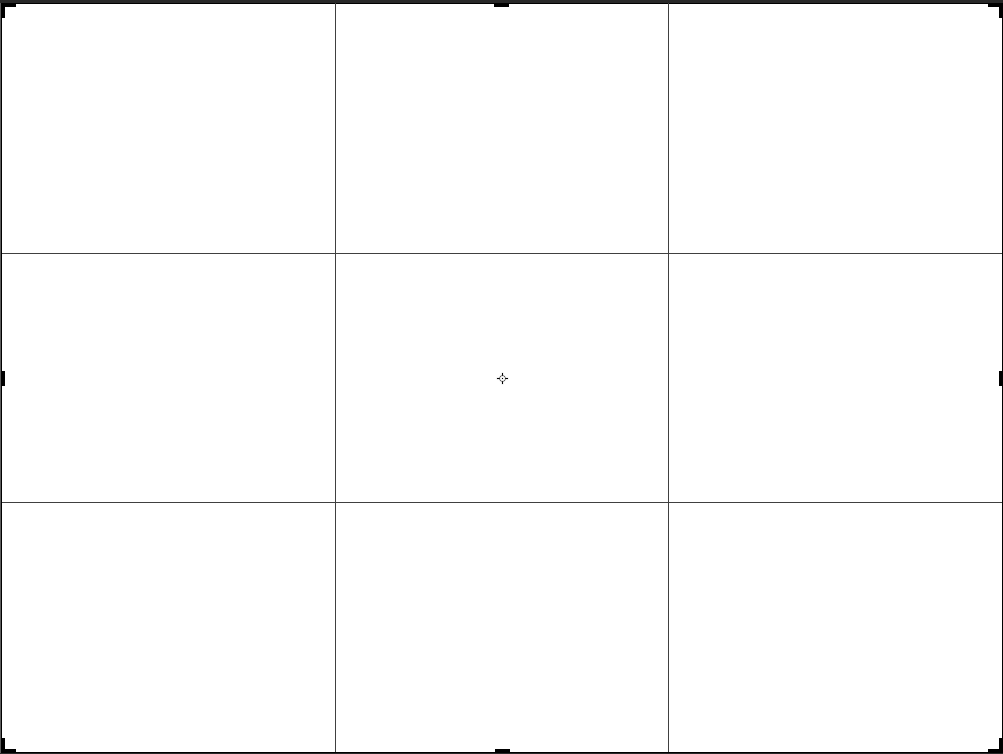
The point of using this grid is you don’t have your subject dead set in the middle. The goal is to have your subject set on the lines, or any of the boxes surrounding the middle one. You can crop a photo to where your subject uses these rules. However if there is something in your photo that you do not want there and you can crop it out, then crop it out. If you can’t, then you’re out of luck. You cannot remove or add anything to a photo. This is unethical and can get your publication into a lot of trouble. If the distracting item cannot be cropped or re-shot, then you have to find another photo to use.
What do levels do?
When you click on the levels icon in the adjustments panel (shown above) you should see what looks like black mountains. This means you had great exposure for your photo. If it shows a lot of straight lines that jump up and down at random points then it means you had weird exposure at the time you took the photo. It could also mean the photo has already been edited.
To edit these levels use you the small arrows on the bottom of the input levels box to form the mountain peaks. To do this you just drag them left and right. This makes the dark and light values of your photo darker and brighter. You need to use your judgement to tell whether it looks good or not. If you’re in doubt, just ask your editor or adviser.

How do I use Brightness and Contrast?
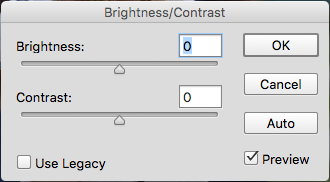
If you’ve already edited the levels and you still think your photo is too dark, you may want to take a look at brightness. Play around with these to get your photo to exactly the way you want it. A lot of times changing the contrast may give your photos the extra sparkle it was missing.
Comments
add a comment